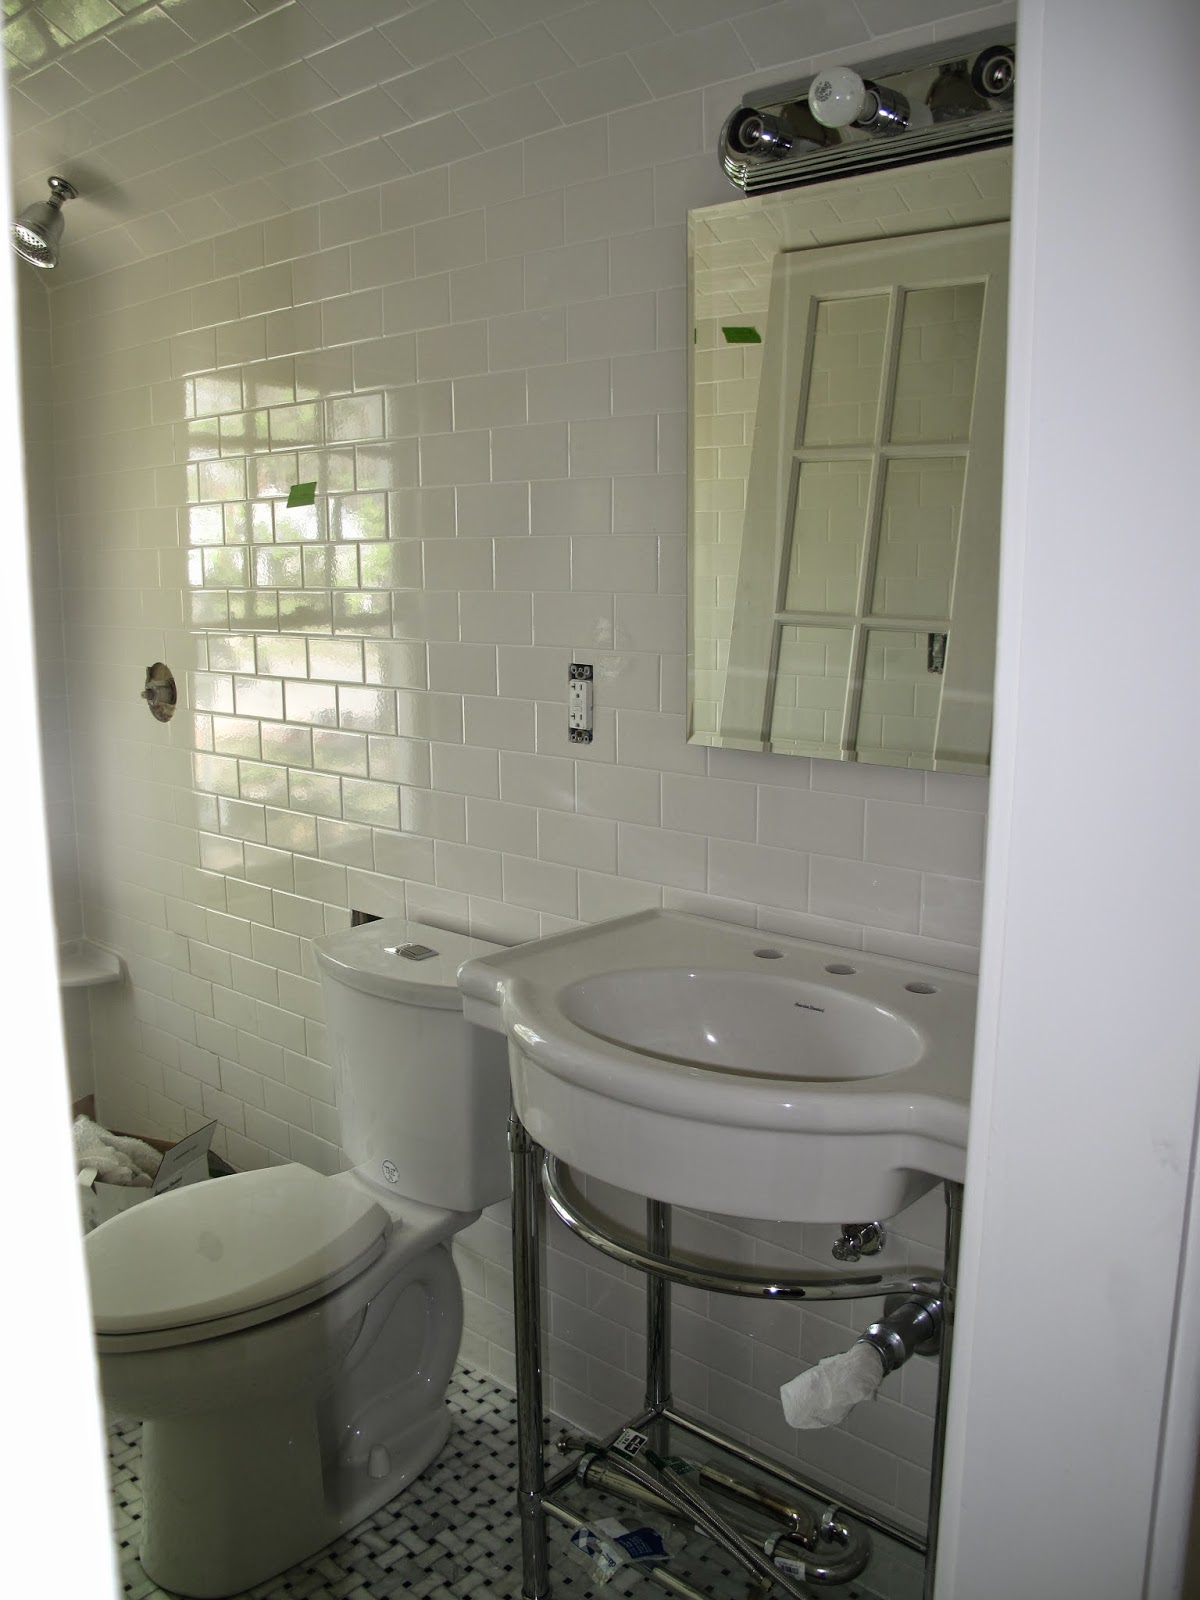
And, speaking of neighbors, they will not be getting a free show. That window will have a reflective covering on the outside and obscure glass on the inside. The door sitting in the middle will also have obscure glass and will be the actual bathroom door. It won't swing in and out, but will slide along a barn door rail system for access into the bathroom.
Monday, April 28, 2014
Upstairs Bath Progress
Here is the upstairs bath in an almost finished state. The small double headed shower will have frame-less glass doors. The shower threshold is actually black stone and the floor is similar to the downstairs bath. It was at Andrew's insistence that the subway tile went all the way up to cover the ceiling and it was such a great idea. This is just a wonderful room to stand in and it is not even finished! Plus, the acoustics for singing in the shower should be awesome...watch out neighbors.
Tuesday, April 1, 2014
A Little Bit of Paint Always Helps
Here is an updated photo of the outside of the house. We painted the shutters and door black and removed the awning over the front porch (and again when I say we, I mean Andrew). The small awning over the upstairs window will also be removed. We are discussing what color we may paint the brick foundation. I vote for charcoal, but Andrew is not sold on it (yet).
Monday, March 31, 2014
Who gets the biggest room in the house?
I do! The biggest room in this house is actually going to be my new art studio. And it will have a sink! Confession time...I don't have a sink now and sometimes I don't wash my brushes - I just leave them in water which is a huge no-no for an artist. The studio isn't quite done, but here are some progress pictures.
With everything ripped out.
New sheet rock.
Ceiling almost finished. We opted for spray foam insulation (You'll see it in photos that will be posted later) and canned lights. We'll put in some full spectrum lights in when I start using the space.
Almost there. Ceiling has been painted, we've used a metallic off white paint for all of the downstairs room. It's now ready for the vinyl flooring we picked to match the hardwoods that run throughout the rest of the downstairs.
Downstairs Bathroom Progress
You have a limited number of days to move into a house you completely gutted. What is the first room you need to finish? We're pretty sure its the bathroom. The downstairs bathroom is not completely finished, but its getting close. The shower fixtures were ordered this week and we have claw foot tub to move in soon. This is the second gray paint color we've tried and although it may get covered in another attempt to find the perfect gray for this space, it is starting to grow on us. Here are some photos from START to "almost" FINISH.
This is the what the bathroom looked like when we bought the house. The picture is taken from the old entrance that was off the kitchen. We put two pocket doors on side walls in this picture. (One where the toilet is sitting and the other directly across from it)
I realize that this picture shows absolutely nothing, but the wall to the left used to be the doorway off of the kitchen. You can see one of the pocket door openings and through that you can actually see the back door.
We went with a classic subway tile and a light grout. We purchased the vanity online. Dark with a white marble top.
Please ignore the refrigerator door and the lamp. Although the lamp is a hand made piece by local artist Ken Collins and we are super excited to have it. It won't stay in the bathroom, it will go in the living area.
This picture is taken from the same spot as and is comparable to the second picture in this post.
Meanwhile...Back at the Ranch.
Well we'd messed about a bit at the new house, but nothing so impressive as to make it to the blog. But then we were contacted by the NC DOT. It seems they are building a railroad bridge close to the house we live in right now. After our property was surveyed, sized-up, and staked off, they informed us that they will be purchasing our entire house and property, AND tearing it down! We certainly don't want to live here, but we hate to see it completely razed. It was constructed around 1890 as part of a local boarding school and housed a professor Cobb. It creaks a bit, and if you drop something it may roll to either one side of the house or the other, but it has character and has survived for over 100 years. Sad to think it won't go to a family who would appreciate all of the hard work put in to remodeling the entire house! But, on the up-side, since we will have around 75 days to pack up and move out, we have to finish the bungalow ASAP.
Here is a bit of the wrap-around porch on our current house. Please ignore the cow. (It lives somewhere else now.)
Sunday, February 17, 2013
Flush with Excitement!
Hi again! We are big dual flush toilet supporters and here is a little picture to ponder...
Never heard of a dual flush toilet? It is exactly what it sounds like. One flush with minimal water for number one (1 gallon or less), and another flush with more water for number two (around 1 1/2 gallon). Just push the appropriate button.
Environmentally friendlier and economic! Win Win.
Wednesday, February 13, 2013
Downstairs Bathroom
Originally, the only access to the downstairs bathroom was through the kitchen. Ahem. Not ideal for several obvious reasons. We sealed up that entrance and Andrew put in two pocket doors. One in the back hallway and the other off of one of the bedrooms.
These doors are original doors from other parts of the house which we are reusing!
The tile work is also now finished. Here is a sneak peak inside before it was painted and grouted.
We went with classic subway tile and a very light shade of grout. The paint color is a medium to dark grey, but we're not exactly happy with it, so Andrew is going to repaint. I'll post when we've nailed the color. Here are some photos we found that helped us opt for gray:
Now, I know you are dying to hear about our plans for water conservation and our dual flush toilets, but I am out of time for now, so more on this room later.
Wednesday, February 6, 2013
This is going to be Expensive!
Well, we got the house cheap, but the rest of this is getting expensive! Most of our current furniture will not be moving with us, there is just not enough room. We even have to get smaller beds. So you buy the beds and then you have to buy sheets, you get the picture. I don't know if any of you like www.houzz.com, but I love it so much that I don't feel the need to pinterest. I was on there looking for daybeds and Andrew better get his tools out, 'cause I want this one! (or something close) Making the bed should save us money, right? He said all he needed was a picture so, Andrew if you are reading this, here it is. Not sure exactly what color to paint it yet.
Here is something else I found on Houzz that I know may drive some of you screaming from the room, but this makes me want to paint a door. I'll admit I don't have the nerve to do this to the front door, but the back door... It would be like a tattoo for your house that no one knows about except your family.
Coral isn't the color I would choose for the bungalow, and not this crazy pattern either, but I'm sure we can come up with something. Night friends!
Wednesday, January 30, 2013
French Doors
We are making progress on the house, we just haven't told you about it! I finally got my cow repaired and am shipping it off to Raleigh today, so I actually have a little time to sit and blog. Here are some photos...
This is the doorway leading into what will be Andrew's office. It was a solid door, and we really wanted a more open feel. This picture was taken standing in the main living area. (For orientation, you can see the open front door in the right of the picture.)
We opted for small french doors. Andrew knocked a little of the wall out, and Voila!
What a big difference it made! We actually were planning on getting a wider set of doors, but these were returned to the store and were on sale. Love sales!
One last picture. Here is the view from the other side of the doorway after Andrew's office was painted.
Monday, December 3, 2012
Painted Cabinets
I have fallen in love with the clean lines of painted shaker style cabinets. I think we are going to opt for a similar pale blue/green/grey with white marble tops as shown below. The look is so peaceful and classic, and we think it will age well. These pictures are stolen from the Urban Grace Interiors Blog.
We are planning to put an island in the middle that will be on casters so that it can be moved. This island will also serve as the kitchen table since we have converted the dining space into living space. Of course, our kitchen will be a lot less grand than these pictures.
I also like the chrome drawer pulls, and we are looking at chrome pendant lights as well as a chrome vent for over the cook top.
Another great thing about this kitchen we may steal is the transom over the entry way and window. (Remodeling term alert! transom - a cross piece separating the door or entry from the fanlight above it) Its a simple thing to add, but it adds a lot of character. It would run from wall to wall right as you enter the kitchen to help separate the kitchen from the living space since we took out the wall that used to divide the room. We will probably not put glass panes in and just leave it open.
One last picture...Here is the style sink I would like. It is called a farm house sink. Beautiful.
I can't wait until the pictures I am posting are of our actual kitchen and not just idea pictures!!
And since we've never really set up a proper kitchen with real dinnerware we might as well do that too, right??? I love these Pfaltzgraff Country Cupboard plates. Wouldn't they just go right along with everything else?
Labels:
blue,
blue green,
cabinets,
chrome,
dinnerware,
drawer pulls,
farmhouse sink,
green,
grey,
island,
kitchen,
marble,
painted cabinets,
sink,
transom
Friday, November 30, 2012
Reuse and Recycle in the Backyard
We have a couple of outdoor sheds in the new backyard and have been talking about what to do with them. Here they are...
They sit up against the side of the apartment at the end of the driveway.
Why don't we recycle them! We have some glass paned doors Andrew has stockpiled from past demolitions and we didn't want to throw them out if they still had some value to them. Well, about 6 months ago we had looked at the Inspiration Green website and found a post with greenhouses made from recycled windows and doors. Andrew recently remembered these and thinks he can use the old doors and modify the sheds. Here are some pictures from that website that show the general idea.
I love all of them and they are all unique. Most were designed around the windows they had collected from neighbors and such. Recycled things are sometimes the most beautiful things.
Tuesday, November 27, 2012
Biggest Room in the House
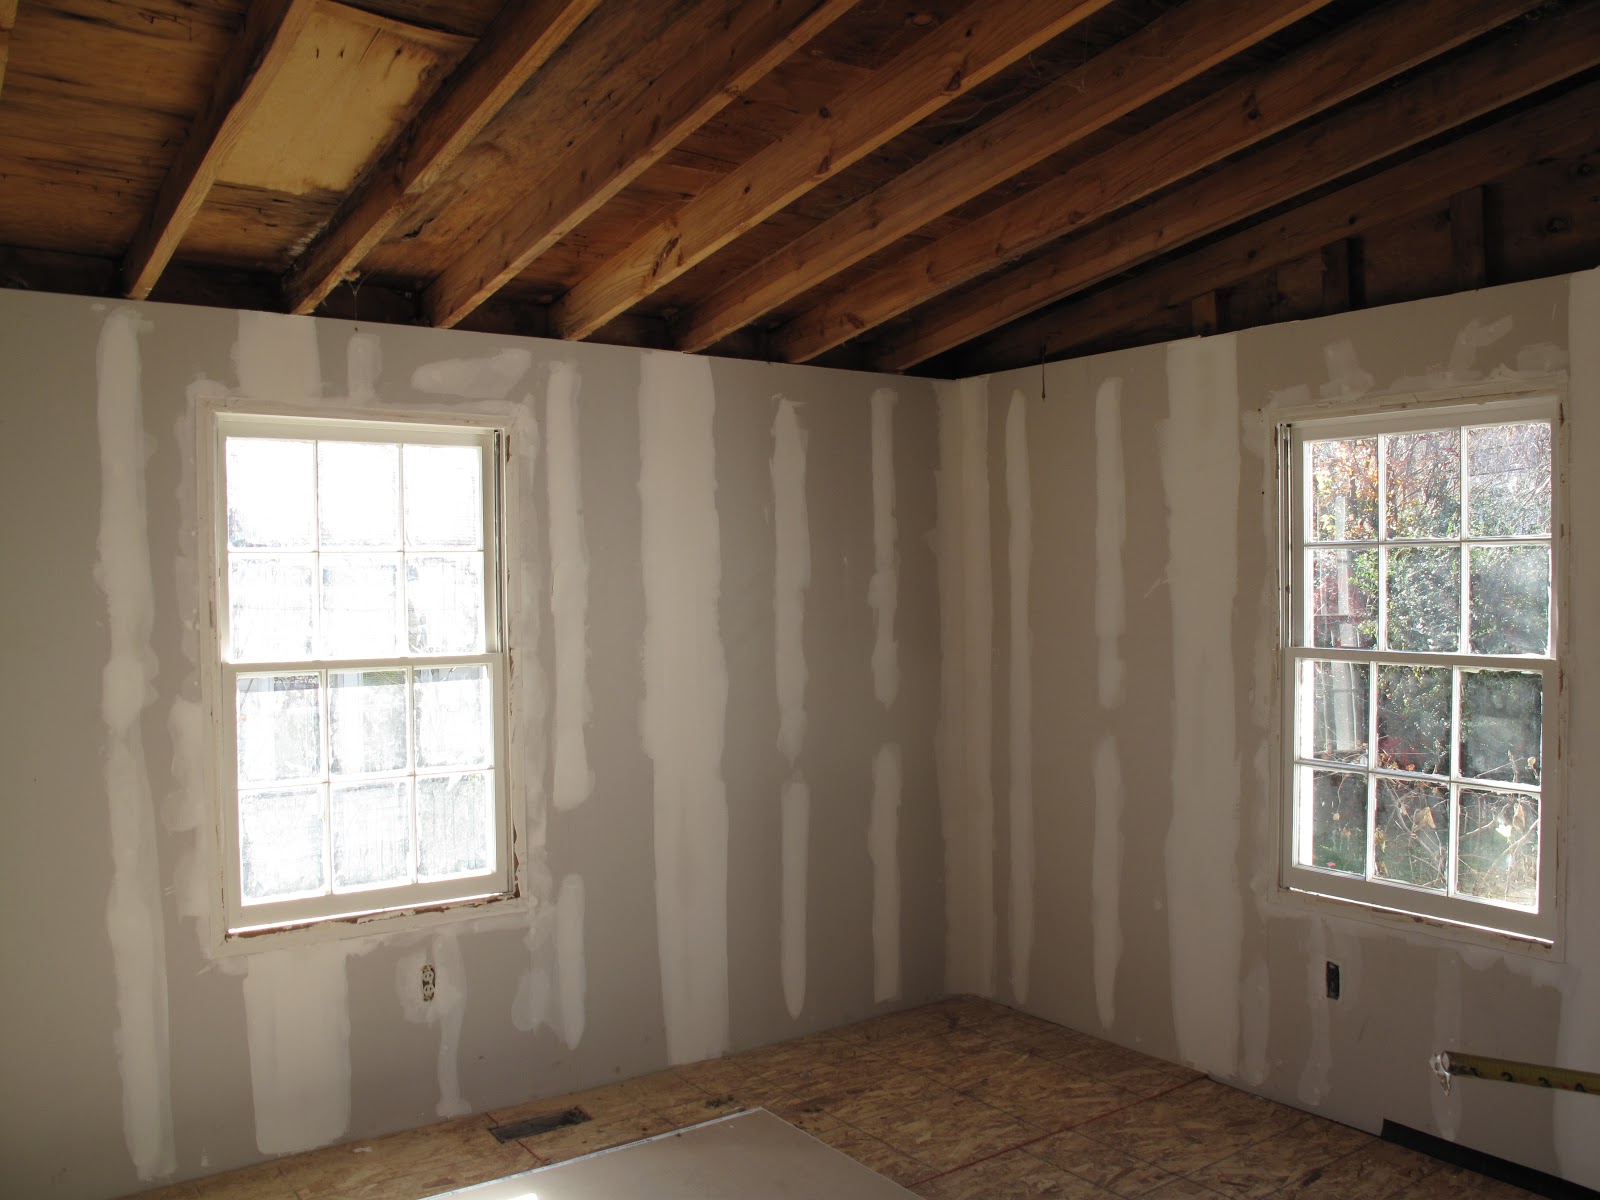
Wanna know what we're using the biggest room in the house for??? My art studio. This is where I say thank you to Andrew! It is such a cool little space, and the sheet rock is up. These pictures start with the north wall and go N to W to S to E to give you a 360 degree view of the room.
We've opted for canned lights throughout most of the downstairs, and I am looking in to to the best bulbs to have for painting. Believe it or not, these three windows can let in too much sunlight to paint under, but I love them anyway.
Saturday, November 24, 2012
Back To Blogging - Upstairs Bath
OK, I won't make any excuses about how busy we've been or all of the things that have happened that took priority over working on our new home,'cause we're back! After a couple of months on hold, Andrew has started working his magic on the bungalow. We are getting ready to start the two bathrooms, so hold on tight, Andrew works fast! Here's what we have so far...
This will be the upstairs bathroom. The shower will be in the back, up against the outside wall (it takes a brave woman to have a window in her shower, but I assure you that glass will not be see-through!) The toilet will be on the right wall about midway, and the sink will be on the right wall, closest to the door. The door will also be a sliding door to keep unity in the design of the upstairs where we will have two other large barn doors. Isn't the shape of this little bathroom great?
We are going with white subway tile, and this is the style of sink I've picked.
This will be the upstairs bathroom. The shower will be in the back, up against the outside wall (it takes a brave woman to have a window in her shower, but I assure you that glass will not be see-through!) The toilet will be on the right wall about midway, and the sink will be on the right wall, closest to the door. The door will also be a sliding door to keep unity in the design of the upstairs where we will have two other large barn doors. Isn't the shape of this little bathroom great?
Here is a picture from the apartment therapy website that is similar in feel to what we want for this bathroom. Although ours will have a tile floor, the shower in this pick is really close to what we have in mind.
Labels:
bathroom,
shower,
shower doors,
sink,
subway tile,
tile,
upstairs bath,
white
Monday, October 1, 2012
Beautiful Idea
I think this is absolutely beautiful. We are planning to use this idea in the downstairs bathroom so I'll need to be on the lookout for old door knobs.
Subscribe to:
Posts (Atom)